<?xml version="1.0" encoding="utf-8"?><feed xmlns="http://www.w3.org/2005/Atom" ><generator uri="https://jekyllrb.com/" version="4.4.1">Jekyll</generator><link href="https://w.willx86.com/feed.xml" rel="self" type="application/atom+xml" /><link href="https://w.willx86.com/" rel="alternate" type="text/html" /><updated>2026-01-25T15:51:06+00:00</updated><id>https://w.willx86.com/feed.xml</id><entry><title type="html">ikea matter, with esp32-c6 on homeassistant</title><link href="https://w.willx86.com/2026/01/24/ikea-matter-with-esp32-c6-on-homeassistant.html" rel="alternate" type="text/html" title="ikea matter, with esp32-c6 on homeassistant" /><published>2026-01-24T12:32:00+00:00</published><updated>2026-01-24T12:32:00+00:00</updated><id>https://w.willx86.com/2026/01/24/ikea-matter-with-esp32-c6-on-homeassistant</id><content type="html" xml:base="https://w.willx86.com/2026/01/24/ikea-matter-with-esp32-c6-on-homeassistant.html"><![CDATA[<h1 id="preface">Preface</h1>

<p>This guide is for people who have:</p>
<ul>
  <li>An ikea matter device <a href="https://www.ikea.com/global/en/newsroom/retail/the-new-smart-home-from-ikea-matter-compatible-251106/">https://www.ikea.com/global/en/newsroom/retail/the-new-smart-home-from-ikea-matter-compatible-251106/</a></li>
  <li>NO hub, as they’re almost $70 USD</li>
  <li>An ESP32-C6 or ESP32-H2 [I used ESP32-C6 Xiao(https://wiki.seeedstudio.com/xiao_esp32c6_getting_started/)</li>
  <li>An already working home assistant</li>
</ul>

<p>The confusing nature of matter,thread,hubs, openrouter etc is very confusing.</p>

<p>We will be turning our ESP into a <em>Thread Border Router</em> which allows us to connect devices to our home assistant.</p>

<p>Thread/Matter are a little confusing so all you need to know is:</p>
<ul>
  <li>Matter is the protocol, e.g. “HTTP”, “MQTT”,”gRPC”</li>
  <li>Thread is the connection, e.g. “WiFi”, “Bluetooth”, “Zigbee”</li>
</ul>

<p>The ikea devices, or at least the one I’m using, cannot use WiFi, only Thread, so the use of a “hub” is required.</p>

<p>This guide is a re-iteration of this post: <a href="https://community.home-assistant.io/t/make-your-own-thread-border-router-for-just-5/962780">LINK HERE</a>, with the reason I’m making this, as I had <em>no idea</em> I wanted a “Thread Border Router”</p>

<p>For me, the distrobox method on the link above didn’t work due to permission issues, so I did it on my <em>host</em> OS (arch).
If are not on Arch, I highly recommend using the distrobox version above, if you have permission issues (in the flashing step) try this instead.</p>

<figure class="highlight"><pre><code class="language-bash" data-lang="bash"><span class="nb">sudo </span>usermod <span class="nt">-aG</span> dialout <span class="nv">$USER</span> <span class="c"># Will probably fail, as arch uses the next command </span>
<span class="nb">sudo </span>usermod <span class="nt">-aG</span> uucp <span class="nv">$USER</span></code></pre></figure>

<h1 id="logout-please-logout">LOGOUT PLEASE LOGOUT</h1>

<p>Read above, then do it, then come back. I promise it’s necessary.</p>

<p>If you logout and type <code class="language-plaintext highlighter-rouge">groups</code> and you see uucp or dialout, you’re good to go.</p>

<h3 id="must-be-on-a-python-version-above-38-39-worked-for-me">Must be on a python version <em>above</em> 3.8, 3.9 worked for me.</h3>

<figure class="highlight"><pre><code class="language-bash" data-lang="bash"><span class="nb">sudo </span>pacman <span class="nt">-S</span> git python python-pip libusb cmake base-devel
<span class="nb">mkdir</span> <span class="nt">-p</span> ~/projects/esp-thread <span class="c"># can change </span>
<span class="nb">cd</span> ~/projects/esp-thread
<span class="nb">rm</span> <span class="nt">-rf</span> cheap-esp-tbr <span class="o">&amp;&amp;</span> <span class="nb">mkdir </span>cheap-esp-tbr <span class="o">&amp;&amp;</span> <span class="nb">cd </span>cheap-esp-tbr
git clone <span class="nt">-b</span> v6.0-beta1 <span class="nt">--recursive</span> https://github.com/espressif/esp-idf.git <span class="nb">.</span>
./install.sh esp32-c6
<span class="nb">source</span> ./export.sh
<span class="nb">cd </span>examples/openthread/ot_rcp
<span class="nb">export </span><span class="nv">LC_ALL</span><span class="o">=</span>C.UTF-8 <span class="nv">TERM</span><span class="o">=</span>xterm</code></pre></figure>

<h3 id="if-you-are-using-an-esp32-c6">If you are using an <em>ESP32-C6</em>:</h3>

<figure class="highlight"><pre><code class="language-bash" data-lang="bash">idf.py set-target esp32c6</code></pre></figure>

<h3 id="if-you-are-using-an-esp32-h2">If you are using an <em>ESP32-H2</em>:</h3>

<figure class="highlight"><pre><code class="language-bash" data-lang="bash">idf.py set-target esp32h2</code></pre></figure>

<h2 id="menu-configuration">Menu configuration</h2>

<figure class="highlight"><pre><code class="language-bash" data-lang="bash">idf.py menuconfig </code></pre></figure>

<p>Navigate to:</p>
<ul>
  <li>Component config  —&gt;
    <ul>
      <li>OpenThread  —&gt;
        <ul>
          <li>Thread Core Feautures  —&gt;
            <ul>
              <li>Thread Radio Co-Processor Feature —&gt;
                <ul>
                  <li>The RCP transport type —&gt;
                    <ul>
                      <li>Select “USB”
Save and quit via:
s,esc,q ( save if prompted)</li>
                    </ul>
                  </li>
                </ul>
              </li>
            </ul>
          </li>
        </ul>
      </li>
    </ul>
  </li>
</ul>

<h1 id="click-below-to-expand">(Click below to expand)</h1>
<details>
<summary> Optional but recommended step for ESP32-C6: </summary>
Plug in your external antenna, do not do this step if you don't have an antenna as you can burn it out.

Edit the file main/esp_ot_rcp.c via: ( or your favorite editor)

<figure class="highlight"><pre><code class="language-bash" data-lang="bash">vi main/esp_ot_rcp.c</code></pre></figure>

Replace the contents with:

<figure class="highlight"><pre><code class="language-c" data-lang="c"><span class="cm">/*
 * SPDX-FileCopyrightText: 2021-2025 Espressif Systems (Shanghai) CO LTD
 *
 * SPDX-License-Identifier: CC0-1.0
 *
 * OpenThread Radio Co-Processor (RCP) Example
 *
 * This example code is in the Public Domain (or CC0-1.0 licensed, at your option.)
 *
 * Unless required by applicable law or agreed to in writing, this
 * software is distributed on an "AS IS" BASIS, WITHOUT WARRANTIES OR
 * CONDITIONS OF ANY KIND, either express or implied.
 */</span>

<span class="cp">#include</span> <span class="cpf">&lt;stdio.h&gt;</span><span class="cp">
#include</span> <span class="cpf">&lt;unistd.h&gt;</span><span class="cp">
</span>
<span class="cp">#include</span> <span class="cpf">"esp_event.h"</span><span class="cp">
#include</span> <span class="cpf">"nvs_flash.h"</span><span class="cp">
#include</span> <span class="cpf">"esp_openthread.h"</span><span class="cp">
#include</span> <span class="cpf">"esp_ot_config.h"</span><span class="cp">
#include</span> <span class="cpf">"esp_vfs_eventfd.h"</span><span class="cp">
</span>
<span class="cp">#if CONFIG_ESP_COEX_EXTERNAL_COEXIST_ENABLE
#include</span> <span class="cpf">"ot_examples_common.h"</span><span class="cp">
#endif
</span>
<span class="cp">#if !SOC_IEEE802154_SUPPORTED
#error "RCP is only supported for the SoCs which have IEEE 802.15.4 module"
#endif
</span>
<span class="cp">#define TAG "ot_esp_rcp"
</span>
<span class="cp">#include</span> <span class="cpf">"driver/gpio.h"</span><span class="cp">
#include</span> <span class="cpf">"freertos/FreeRTOS.h"</span><span class="cp">
#include</span> <span class="cpf">"freertos/task.h"</span><span class="cp">
</span>
<span class="k">static</span> <span class="kt">void</span> <span class="nf">xiao_select_external_antenna</span><span class="p">(</span><span class="kt">void</span><span class="p">)</span>
<span class="p">{</span>
    <span class="n">gpio_set_direction</span><span class="p">(</span><span class="n">GPIO_NUM_3</span><span class="p">,</span> <span class="n">GPIO_MODE_OUTPUT</span><span class="p">);</span>
    <span class="n">gpio_set_level</span><span class="p">(</span><span class="n">GPIO_NUM_3</span><span class="p">,</span> <span class="mi">0</span><span class="p">);</span>
    <span class="n">vTaskDelay</span><span class="p">(</span><span class="n">pdMS_TO_TICKS</span><span class="p">(</span><span class="mi">100</span><span class="p">));</span>
    <span class="n">gpio_set_direction</span><span class="p">(</span><span class="n">GPIO_NUM_14</span><span class="p">,</span> <span class="n">GPIO_MODE_OUTPUT</span><span class="p">);</span>
    <span class="n">gpio_set_level</span><span class="p">(</span><span class="n">GPIO_NUM_14</span><span class="p">,</span> <span class="mi">1</span><span class="p">);</span>
<span class="p">}</span>

<span class="k">extern</span> <span class="kt">void</span> <span class="nf">otAppNcpInit</span><span class="p">(</span><span class="n">otInstance</span> <span class="o">*</span><span class="n">instance</span><span class="p">);</span>

<span class="kt">void</span> <span class="nf">app_main</span><span class="p">(</span><span class="kt">void</span><span class="p">)</span>
<span class="p">{</span>
    <span class="n">xiao_select_external_antenna</span><span class="p">();</span>

    <span class="c1">// Used eventfds:</span>
    <span class="c1">// * ot task queue</span>
    <span class="c1">// * radio driver</span>
    <span class="n">esp_vfs_eventfd_config_t</span> <span class="n">eventfd_config</span> <span class="o">=</span> <span class="p">{</span>
        <span class="p">.</span><span class="n">max_fds</span> <span class="o">=</span> <span class="mi">2</span><span class="p">,</span>
    <span class="p">};</span>

    <span class="n">ESP_ERROR_CHECK</span><span class="p">(</span><span class="n">nvs_flash_init</span><span class="p">());</span>
    <span class="n">ESP_ERROR_CHECK</span><span class="p">(</span><span class="n">esp_event_loop_create_default</span><span class="p">());</span>
    <span class="n">ESP_ERROR_CHECK</span><span class="p">(</span><span class="n">esp_vfs_eventfd_register</span><span class="p">(</span><span class="o">&amp;</span><span class="n">eventfd_config</span><span class="p">));</span>

<span class="cp">#if CONFIG_ESP_COEX_EXTERNAL_COEXIST_ENABLE
</span>    <span class="n">ot_external_coexist_init</span><span class="p">();</span>
<span class="cp">#endif
</span>
    <span class="k">static</span> <span class="n">esp_openthread_platform_config_t</span> <span class="n">config</span> <span class="o">=</span> <span class="p">{</span>
        <span class="p">.</span><span class="n">radio_config</span> <span class="o">=</span> <span class="n">ESP_OPENTHREAD_DEFAULT_RADIO_CONFIG</span><span class="p">(),</span>
        <span class="p">.</span><span class="n">host_config</span> <span class="o">=</span> <span class="n">ESP_OPENTHREAD_DEFAULT_HOST_CONFIG</span><span class="p">(),</span>
        <span class="p">.</span><span class="n">port_config</span> <span class="o">=</span> <span class="n">ESP_OPENTHREAD_DEFAULT_PORT_CONFIG</span><span class="p">(),</span>
    <span class="p">};</span>

    <span class="n">ESP_ERROR_CHECK</span><span class="p">(</span><span class="n">esp_openthread_start</span><span class="p">(</span><span class="o">&amp;</span><span class="n">config</span><span class="p">));</span>
<span class="p">}</span></code></pre></figure>


</details>

<h2 id="flashing">Flashing</h2>
<p>Plugin your esp32, I personally held down boot as I plugged it in to ensure it went into flashing mode. ( Tiny B button)
Verify your device is there via:</p>

<figure class="highlight"><pre><code class="language-bash" data-lang="bash"><span class="nb">ls</span> /dev/ttyUSB<span class="k">*</span>  <span class="c"># or /dev/ttyACM* </span></code></pre></figure>

<p>If the above command has nothing, try ls /dev/tty* and see if you have anything that isn’t /dev/ttyX or /dev/ttySX where X is a number</p>

<p>Then flash it via:</p>

<figure class="highlight"><pre><code class="language-bash" data-lang="bash">idf.py build flash</code></pre></figure>

<p>If you’re having permissions issues, try to verify your group via <code class="language-plaintext highlighter-rouge">groups</code> and if you’re not in uucp or dialout, re-run the commands at the start, logout, then try again.</p>

<h2 id="connect-to-home-assistant">Connect to Home Assistant</h2>
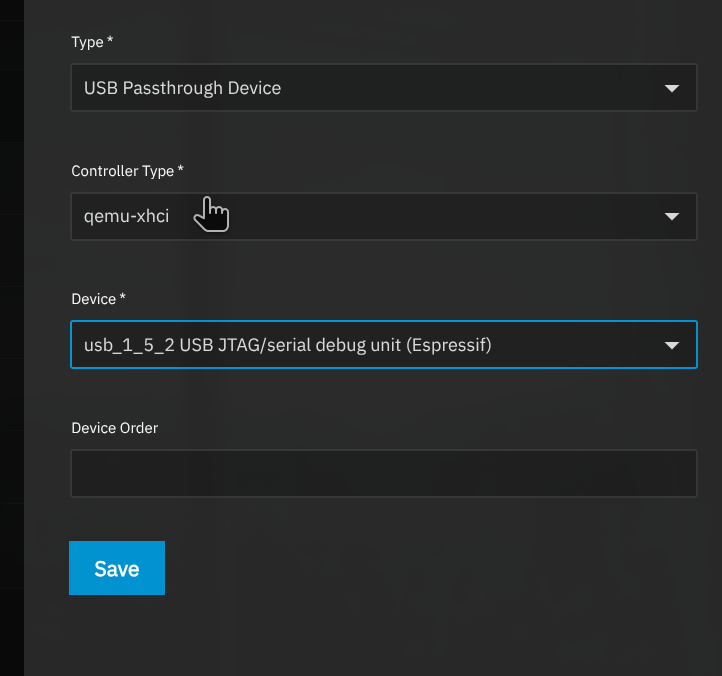
<p>You need to plug the ESP32 into your home assistant box, via USB.
If you’re using a VM, pass through the device, I’m using a TruenasVM my settings were as follows:</p>

<p><img src="/assets/images/truenas-esp32-passthrough.png" alt="truenas vm usb passthrough" width="100%" /></p>

<p>Restart your VM if you’re in one, then if you’ve installed any other Open Thread Border, Thread Border Router or Matter integrations, remove them. ( Assuming they’re not already being used)</p>

<p>Install the addon from <a href="https://my.home-assistant.io/redirect/supervisor_addon?addon=core_openthread_border_router">This link</a></p>

<p>Before you start it:</p>
<ul>
  <li>Go to configuration, and set the device to the /dev/serial/by-id/usb-Espressif…. option, NOT the /dev/ttyAMA option</li>
  <li>Disable Hardware Flow Control</li>
</ul>

<p>Start the addon.</p>

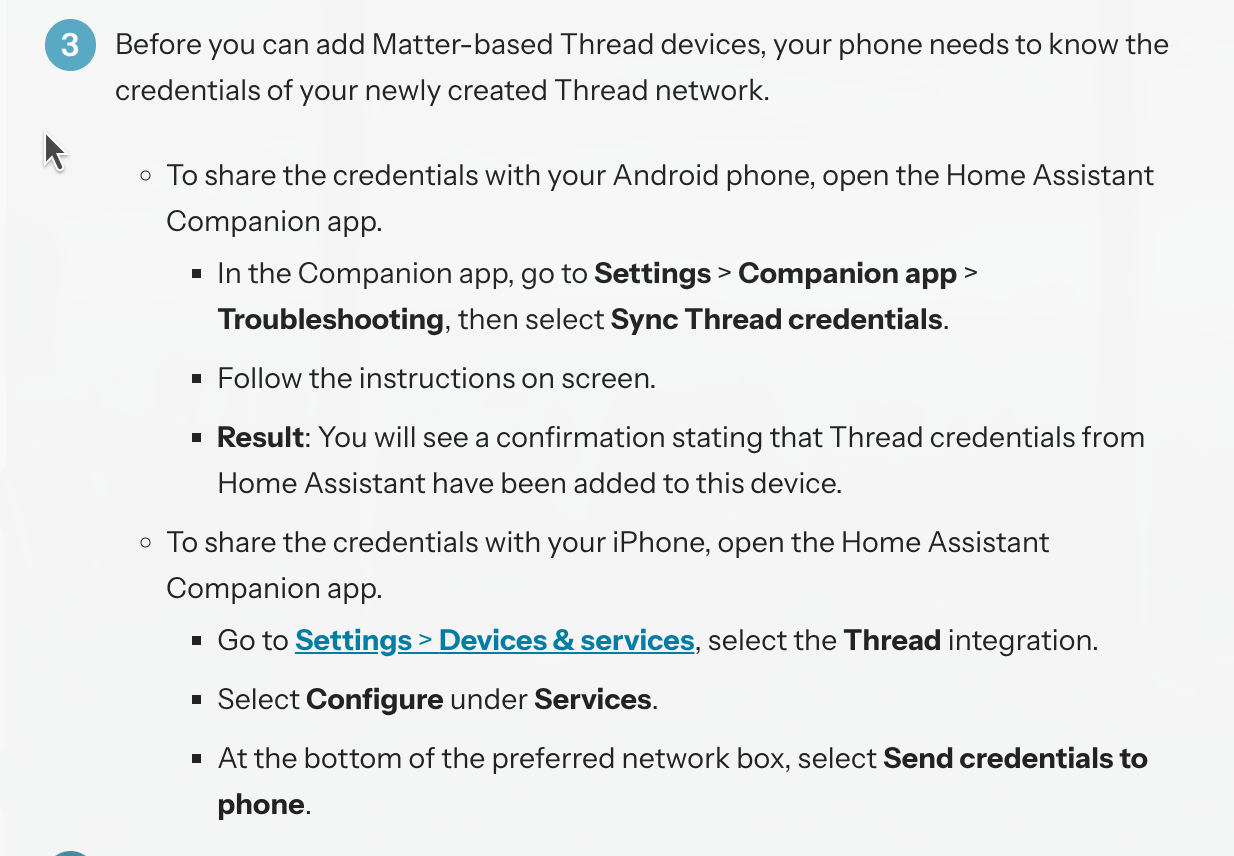
<p>Now you’ll need your mobile device, and to follow <a href="https://www.home-assistant.io/integrations/thread#to-make-home-assistant-your-first-thread-network">step three HERE</a></p>

<p><img src="/assets/images/companion-app.png" alt="thread setup home assistant" width="100%" /></p>

<p>After this, restart your home assistant app, and follow the steps <a href="https://www.home-assistant.io/integrations/matter/#adding-a-matter-device-to-home-assistant">HERE</a></p>

<p>If you’re having issues, try the following steps:</p>
<ul>
  <li>Verify that the flashing worked, and you didn’t get an error during flashing earlier</li>
  <li>You’re on a python version above 3.8</li>
  <li>You’ve restarted your app, and done step 3 <a href="https://www.home-assistant.io/integrations/thread#to-make-home-assistant-your-first-thread-network">here</a></li>
  <li>Make sure you’re on your local wifi with no Tailscale, VPN, etc</li>
</ul>

<p>Otherwise, you should have your device working! 
If you have any issues, please feel free to contact me and I’ll be more than happy to help.</p>]]></content><author><name></name></author><summary type="html"><![CDATA[Preface]]></summary></entry><entry><title type="html">tree secrets</title><link href="https://w.willx86.com/2026/01/21/tree-secrets.html" rel="alternate" type="text/html" title="tree secrets" /><published>2026-01-21T12:44:00+00:00</published><updated>2026-01-21T12:44:00+00:00</updated><id>https://w.willx86.com/2026/01/21/tree-secrets</id><content type="html" xml:base="https://w.willx86.com/2026/01/21/tree-secrets.html"><![CDATA[<h2 id="preface">Preface:</h2>
<p>If you regularly use <em>man</em> you’ll read this post and thing I’m an idiot, but I suspect I’m not the only one with a shallow understanding of what they use.</p>

<p>I’ve used Linux for what is considered a short period of time, though for me, it’s 28% of my life.</p>

<p>More like 50% if we’re counting the time I was actually conscious.</p>

<p>I’m sure at some point you’ve ran tree, possibly many many times, but how many times have you used <em>more</em> than just <code class="language-plaintext highlighter-rouge">tree</code>?</p>

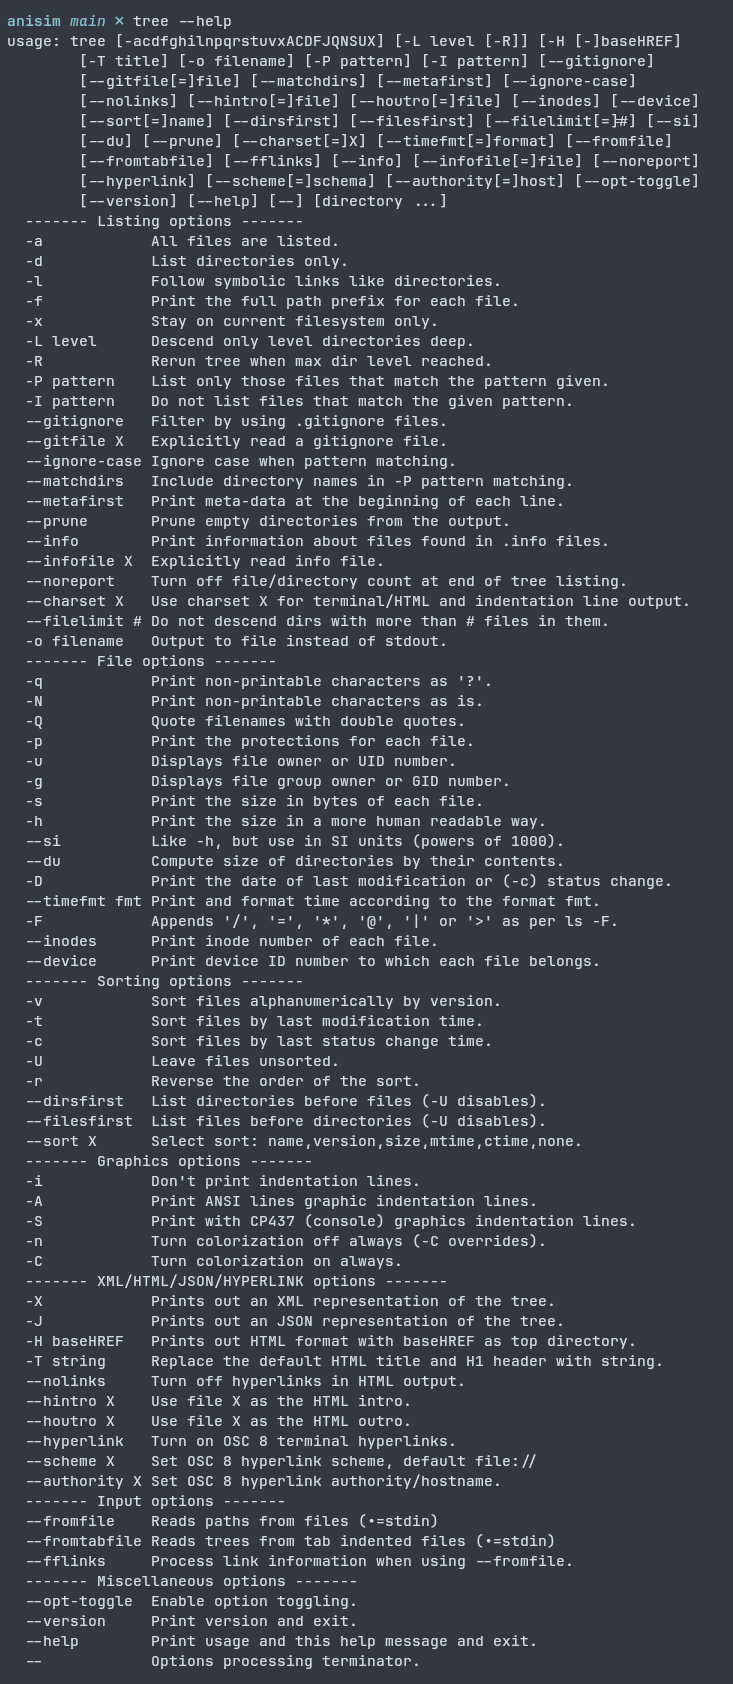
<p>I’ve never explored past the basic <code class="language-plaintext highlighter-rouge">tree</code> until today, when I was trying to add my project structure to my README.md when I finally ran <code class="language-plaintext highlighter-rouge">tree --help</code></p>

<p>My project, ‘AniSim’ a comparison site for users to compare their anime watch-history to others, has a beautiful node_modules, so throwing in a <code class="language-plaintext highlighter-rouge">tree</code> resulted in:</p>

<figure class="highlight"><pre><code class="language-bash" data-lang="bash">tree | <span class="nb">wc</span> <span class="nt">-l</span></code></pre></figure>

<p>1631 lines…</p>

<p>The resulting <code class="language-plaintext highlighter-rouge">tree --help</code> was, a beautiful block of text that I’d consider, mildy overwhelming.</p>

<p>Not sure if I really need to use tree -acdfhjilnpqrstuvxACDFJQNSUX, I think something has probably gone wrong if I ever do.</p>

<p><img src="/assets/images/tree-help.png" alt="tree-help" width="100%" /></p>

<p>So I’ll hanker-down to what I deem interesting to learn about, and you probably didn’t know.</p>

<h1 id="the-main-two">The main two</h1>

<h2 id="1-ignore-with--i">1. Ignore with -I</h2>
<p>Using</p>

<figure class="highlight"><pre><code class="language-bash" data-lang="bash">tree <span class="nt">-I</span> node_modules</code></pre></figure>

<p>will exclude node_modules, which is fairly nice outputting:</p>

<figure class="highlight"><pre><code class="language-bash" data-lang="bash">anisim main ? ❯ tree <span class="nt">-I</span> node_modules
<span class="nb">.</span>
├── cmd
│   └── anisim
│       └── main.go
├── docker-compose.yml
├── go.mod
├── go.sum
├── internal
│   ├── analyzer
│   │   ├── analyzer.go
│   │   └── analyzer_types.go
.....
├── tmp
│   ├── build-errors.log
│   └── main</code></pre></figure>

<p>But I have an issue here,</p>
<div class="language-plaintext highlighter-rouge"><div class="highlight"><pre class="highlight"><code>
└── tmp
    ├── build-errors.log
    └── main

23 directories, 45 files
</code></pre></div></div>

<p>I don’t want my tmp files.</p>

<h2 id="2-gitignore-with-gitignore">2. Gitignore with –gitignore</h2>
<p>It does what it says on the tin, which is what most people will ever need.</p>

<figure class="highlight"><pre><code class="language-bash" data-lang="bash">tree <span class="nt">--gitignore</span></code></pre></figure>

<p>For 99% of what I’ll ever need, this is perfect. But If I’m this ignorant about a command I’ve used 100’s of times, where else is there?</p>

<h2 id="tree--l-n-level">tree -L N (Level)</h2>
<p>This limits the depth of the tree output, 1 being just the current directory, 2 being current + 1 subdirectory etc.</p>

<figure class="highlight"><pre><code class="language-bash" data-lang="bash">anisim main ? ✗ tree <span class="nt">-L</span> 1
<span class="nb">.</span>
├── cmd
├── docker-compose.yml
├── go.mod
├── go.sum
├── internal
....
9 directories, 10 files</code></pre></figure>

<h2 id="tree-fromfile">tree –fromfile</h2>
<p>This essentially performs a tree but only from a file, so if we use stdin for this I can list all of the .go files in my directory</p>

<figure class="highlight"><pre><code class="language-bash" data-lang="bash">anisim main ? ❯ find <span class="nb">.</span> <span class="nt">-name</span> <span class="s2">"*.go"</span> | tree <span class="nt">--fromfile</span>
<span class="nb">.</span>
└── <span class="nb">.</span>
    ├── cmd
    │   └── anisim
    │       └── main.go
    ├── internal
    │   ├── analyzer
    │   │   ├── analyzer.go
    │   │   └── analyzer_types.go
    │   ├── anilist
    │   │   ├── anilist.go
    │   │   └── recommendation
    │   │       └── recommendation.go</code></pre></figure>

<h2 id="tree--t--sort-by-time">tree -t ( Sort by time)</h2>

<p>This lists files sorted by time, which is fairly useful for seeing what you’ve changed recently. 
Combining this withh -L2, –gitignore and -D for the time modified, we get:</p>

<figure class="highlight"><pre><code class="language-bash" data-lang="bash">anisim main ? ✗ tree <span class="nt">-t</span> <span class="nt">-L</span> 2 <span class="nt">--gitignore</span> <span class="nt">-D</span>                                                                                                                                                                 
<span class="o">[</span>Jan 21 14:07]  <span class="nb">.</span>
├── <span class="o">[</span>Jan 17 17:32]  cmd
│   └── <span class="o">[</span>Jan 17 18:21]  anisim
├── <span class="o">[</span>Jan 17 18:07]  tailwind.config.js
├── <span class="o">[</span>Jan 17 18:08]  package.json
├── <span class="o">[</span>Jan 17 18:08]  static
│   └── <span class="o">[</span>Jan 17 18:40]  css
.....</code></pre></figure>

<h2 id="tree-inodes-filthy-pirate">tree –inodes (Filthy pirate)</h2>

<p>Some of you, like me, will know what an inode is, and some of you, like me, will only know what this is, as you’re trying to figure out, if your Radarr, Sonarr, Lidarr setup is correctly hardlinking files to save beautiful hard-drive space.</p>

<p>Now this is a terrible way of doing it, but doing tree –inodes in your Shows/Movies folder and once in your /Downloads folder will show the inode #. e.g.:</p>

<figure class="highlight"><pre><code class="language-bash" data-lang="bash">/Downloads
└── <span class="o">[</span>   8916]  XXXX.mkv
/Shows
├── <span class="o">[</span>   8916]  XXXX-Different name.mkv</code></pre></figure>

<p>Realistically if you were doing this, you’d do something like:</p>

<figure class="highlight"><pre><code class="language-bash" data-lang="bash">…/Record of Ragnarok 2021/Season 3 ❯ <span class="nb">stat </span>XXXX.mkv
  File: XXXX.mkv
  Size: Alot Blocks: More than 1 IO Block: 1048576 regular file
Device: 0,116	Inode: 8916        Links: 2 
Access: <span class="o">(</span>0666/-rw-rw-rw-<span class="o">)</span>  Uid: <span class="o">(</span>  568/ UNKNOWN<span class="o">)</span>   Gid: <span class="o">(</span>  568/ UNKNOWN<span class="o">)</span>
Access: 2025-12-23 14:13:57.561329090 +0000
Modify: 2025-12-23 14:17:42.192496523 +0000
Change: 2025-12-23 14:18:02.220778933 +0000
 Birth: 2025-12-23 14:13:57.561329090 +0000</code></pre></figure>

<div class="language-plaintext highlighter-rouge"><div class="highlight"><pre class="highlight"><code>Device: 0,116	Inode: 8916        Links: 2 
</code></pre></div></div>
<p>This line is what you’re looking for, but hey, not everyone is a filthy pirate.</p>

<p>Anyway, that’s enough typing, hopefully you learned something, and I’m going to work on learning the actual tools I use, as it’s very easy to take constant shortcuts, only for them to slow you down over time.</p>]]></content><author><name></name></author><summary type="html"><![CDATA[Preface: If you regularly use man you’ll read this post and thing I’m an idiot, but I suspect I’m not the only one with a shallow understanding of what they use.]]></summary></entry><entry><title type="html">Disable all filters protonmail</title><link href="https://w.willx86.com/2026/01/08/disable-all-filters-protonmail.html" rel="alternate" type="text/html" title="Disable all filters protonmail" /><published>2026-01-08T12:05:00+00:00</published><updated>2026-01-08T12:05:00+00:00</updated><id>https://w.willx86.com/2026/01/08/disable-all-filters-protonmail</id><content type="html" xml:base="https://w.willx86.com/2026/01/08/disable-all-filters-protonmail.html"><![CDATA[<p>I wanted to disable all filters in my proton account, primarily as I realised I wanted a Sieve filter not 100’s of filters.</p>

<p>Open up <a href="https://account.proton.me/u/1/mail/filters">https://account.proton.me/u/1/mail/filters</a></p>

<p>Open console etc, then run:</p>

<div class="language-javascript highlighter-rouge"><div class="highlight"><pre class="highlight"><code><span class="nb">document</span><span class="p">.</span><span class="nf">querySelectorAll</span><span class="p">(</span><span class="dl">'</span><span class="s1">.toggle-container--checked</span><span class="dl">'</span><span class="p">).</span><span class="nf">forEach</span><span class="p">(</span><span class="nx">el</span> <span class="o">=&gt;</span> <span class="nx">el</span><span class="p">.</span><span class="nf">click</span><span class="p">());</span>
</code></pre></div></div>

<p>Always be careful when running scripts, especially when running them from some random persons website….</p>]]></content><author><name></name></author><summary type="html"><![CDATA[I wanted to disable all filters in my proton account, primarily as I realised I wanted a Sieve filter not 100’s of filters.]]></summary></entry><entry><title type="html">ocr paste alias - linux</title><link href="https://w.willx86.com/2026/01/08/ocr-paste-alias.html" rel="alternate" type="text/html" title="ocr paste alias - linux" /><published>2026-01-08T11:42:00+00:00</published><updated>2026-01-08T11:42:00+00:00</updated><id>https://w.willx86.com/2026/01/08/ocr-paste-alias</id><content type="html" xml:base="https://w.willx86.com/2026/01/08/ocr-paste-alias.html"><![CDATA[<p><a href="https://github.com/tesseract-ocr/tessdoc/blob/main/Installation.md">install tesseract link</a></p>

<div class="language-bash highlighter-rouge"><div class="highlight"><pre class="highlight"><code><span class="nb">alias </span><span class="nv">ocr</span><span class="o">=</span><span class="s2">"wl-paste --type image/png | tesseract stdin stdout | wl-copy"</span>
</code></pre></div></div>

<p>Occasionally I find myself within the maze of navigating the “world wide web” and trying to do something simple.</p>

<p>Ever tried to generate a QR code and realized the link is <em>not</em> to your domain, but to the QR’s generated site, so tracking and ads can be implemented ?</p>

<p>Or tried to convert a PDF and stumbled upon the dreaded adobe domain?</p>

<p>Anyway, I’m getting off topic.</p>

<p>I’ve had this same issue with OCR, so simply put, I created an alias that OCR’s the image in my clipboard, and copies said result back into clipboard.</p>

<p>Install tesseract-ocr and if asked about the data, aur etc, install the -eng version.</p>

<p>Add your alias, and voila, you can now copy an image, run <code class="language-plaintext highlighter-rouge">ocr</code> in your terminal, and paste the text anywhere you want.</p>]]></content><author><name></name></author><summary type="html"><![CDATA[install tesseract link]]></summary></entry><entry><title type="html">Creating a cli tool for forgetting</title><link href="https://w.willx86.com/2025/12/18/iff-cli-tool.html" rel="alternate" type="text/html" title="Creating a cli tool for forgetting" /><published>2025-12-18T15:51:00+00:00</published><updated>2025-12-18T15:51:00+00:00</updated><id>https://w.willx86.com/2025/12/18/iff-cli-tool</id><content type="html" xml:base="https://w.willx86.com/2025/12/18/iff-cli-tool.html"><![CDATA[<p><a href="https://github.com/will-x86/iff">https://github.com/will-x86/iff</a></p>

<p>Today I set myself a simple task, create a tool where I can find old commands.
Primarily because I can never remember if it’s:</p>

<div class="language-plaintext highlighter-rouge"><div class="highlight"><pre class="highlight"><code>curl 'https://api.ipify.org?format=json
</code></pre></div></div>

<p>or</p>
<div class="language-plaintext highlighter-rouge"><div class="highlight"><pre class="highlight"><code>curl 'https://ipify.org/api?format=json
</code></pre></div></div>

<p>So I figured why not make a tool to not forget.</p>

<p>It’s written in rust(btw) and uses <a href="https://ratatui.rs/">ratatui</a> and <a href="https://docs.rs/clap/latest/clap/">clap</a>.</p>

<p>The process is:</p>
<ul>
  <li>Take input command</li>
  <li>Search bash / zsh history</li>
  <li>Search for any matches</li>
  <li>Allow for searching</li>
  <li>Upon selection, run the command :)</li>
</ul>

<p>I’m sure I can use autocomplete, but I figured it’d be a nice opportunity to use ratatui.</p>

<p>My only critique of ratatui is having main branch examples not being the cargo version.It’s mildly annoying.</p>

<p>I’ve had this problem with esp-idf before, where I was using X.XX.B and the branch was X.XX.A. Skill issue I guess.</p>

<p>Anyway, it’s on the AUR/Cargo, you can install it via:</p>

<div class="language-plaintext highlighter-rouge"><div class="highlight"><pre class="highlight"><code>cargo install ifff
</code></pre></div></div>

<p>or</p>

<div class="language-plaintext highlighter-rouge"><div class="highlight"><pre class="highlight"><code>yay -S iff
</code></pre></div></div>

<p><img src="https://github.com/will-x86/iff/raw/main/media/screenshot.png" alt="image" width="100%" /></p>

<p>Lastly, if you’re wondering what iff stands for, it’s “I fucking forgot”. Because.. I’m a child</p>]]></content><author><name></name></author><summary type="html"><![CDATA[https://github.com/will-x86/iff]]></summary></entry><entry><title type="html">Printing ssh messages to my thermal printer</title><link href="https://w.willx86.com/2025/11/06/printing-messages-from-my-site.html" rel="alternate" type="text/html" title="Printing ssh messages to my thermal printer" /><published>2025-11-06T16:45:00+00:00</published><updated>2025-11-06T16:45:00+00:00</updated><id>https://w.willx86.com/2025/11/06/printing-messages-from-my-site</id><content type="html" xml:base="https://w.willx86.com/2025/11/06/printing-messages-from-my-site.html"><![CDATA[<p>Everything has a period in age, where it becomes interesting, as it’s no longer old “crap” but “cool old crap”</p>

<p>See typewriters, they’re to most, not cool.</p>

<p>But Camcorders ? Walkmans ? iPods? They’re in the correct threshold for “cool” (for me)</p>

<p>To me? Thermal printers are cool. Eventually they won’t be, but for now? Cool.</p>

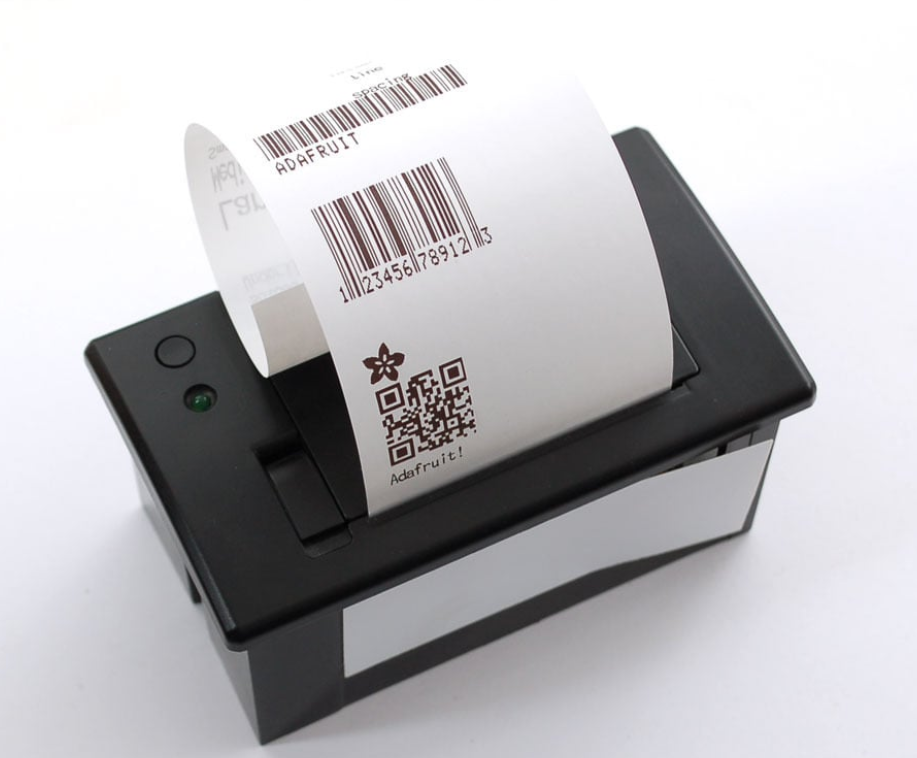
<p>I recently bought one of these:
https://learn.adafruit.com/mini-thermal-receipt-printer
<img src="/assets/images/thermal_printer.png" alt="image" width="100%" /></p>

<p>I had the bright idea of making messages print from my website.</p>

<p>Not this website, the top level of this site, willx86.com</p>

<p>Only accessible via SSH, I felt like it was the right place to put it.</p>

<p>Try it :)</p>

<p><code class="language-plaintext highlighter-rouge">ssh willx86.com</code></p>

<p>You’ll be prompted with a very intelligent question:</p>

<p><img src="/assets/images/inteligant.png" alt="image" width="100%" /></p>

<p>After the objectively correct answer, you’ll see a “message me” on the bottom right, press ‘m’, type your message and it’ll get printed over at my desk.</p>

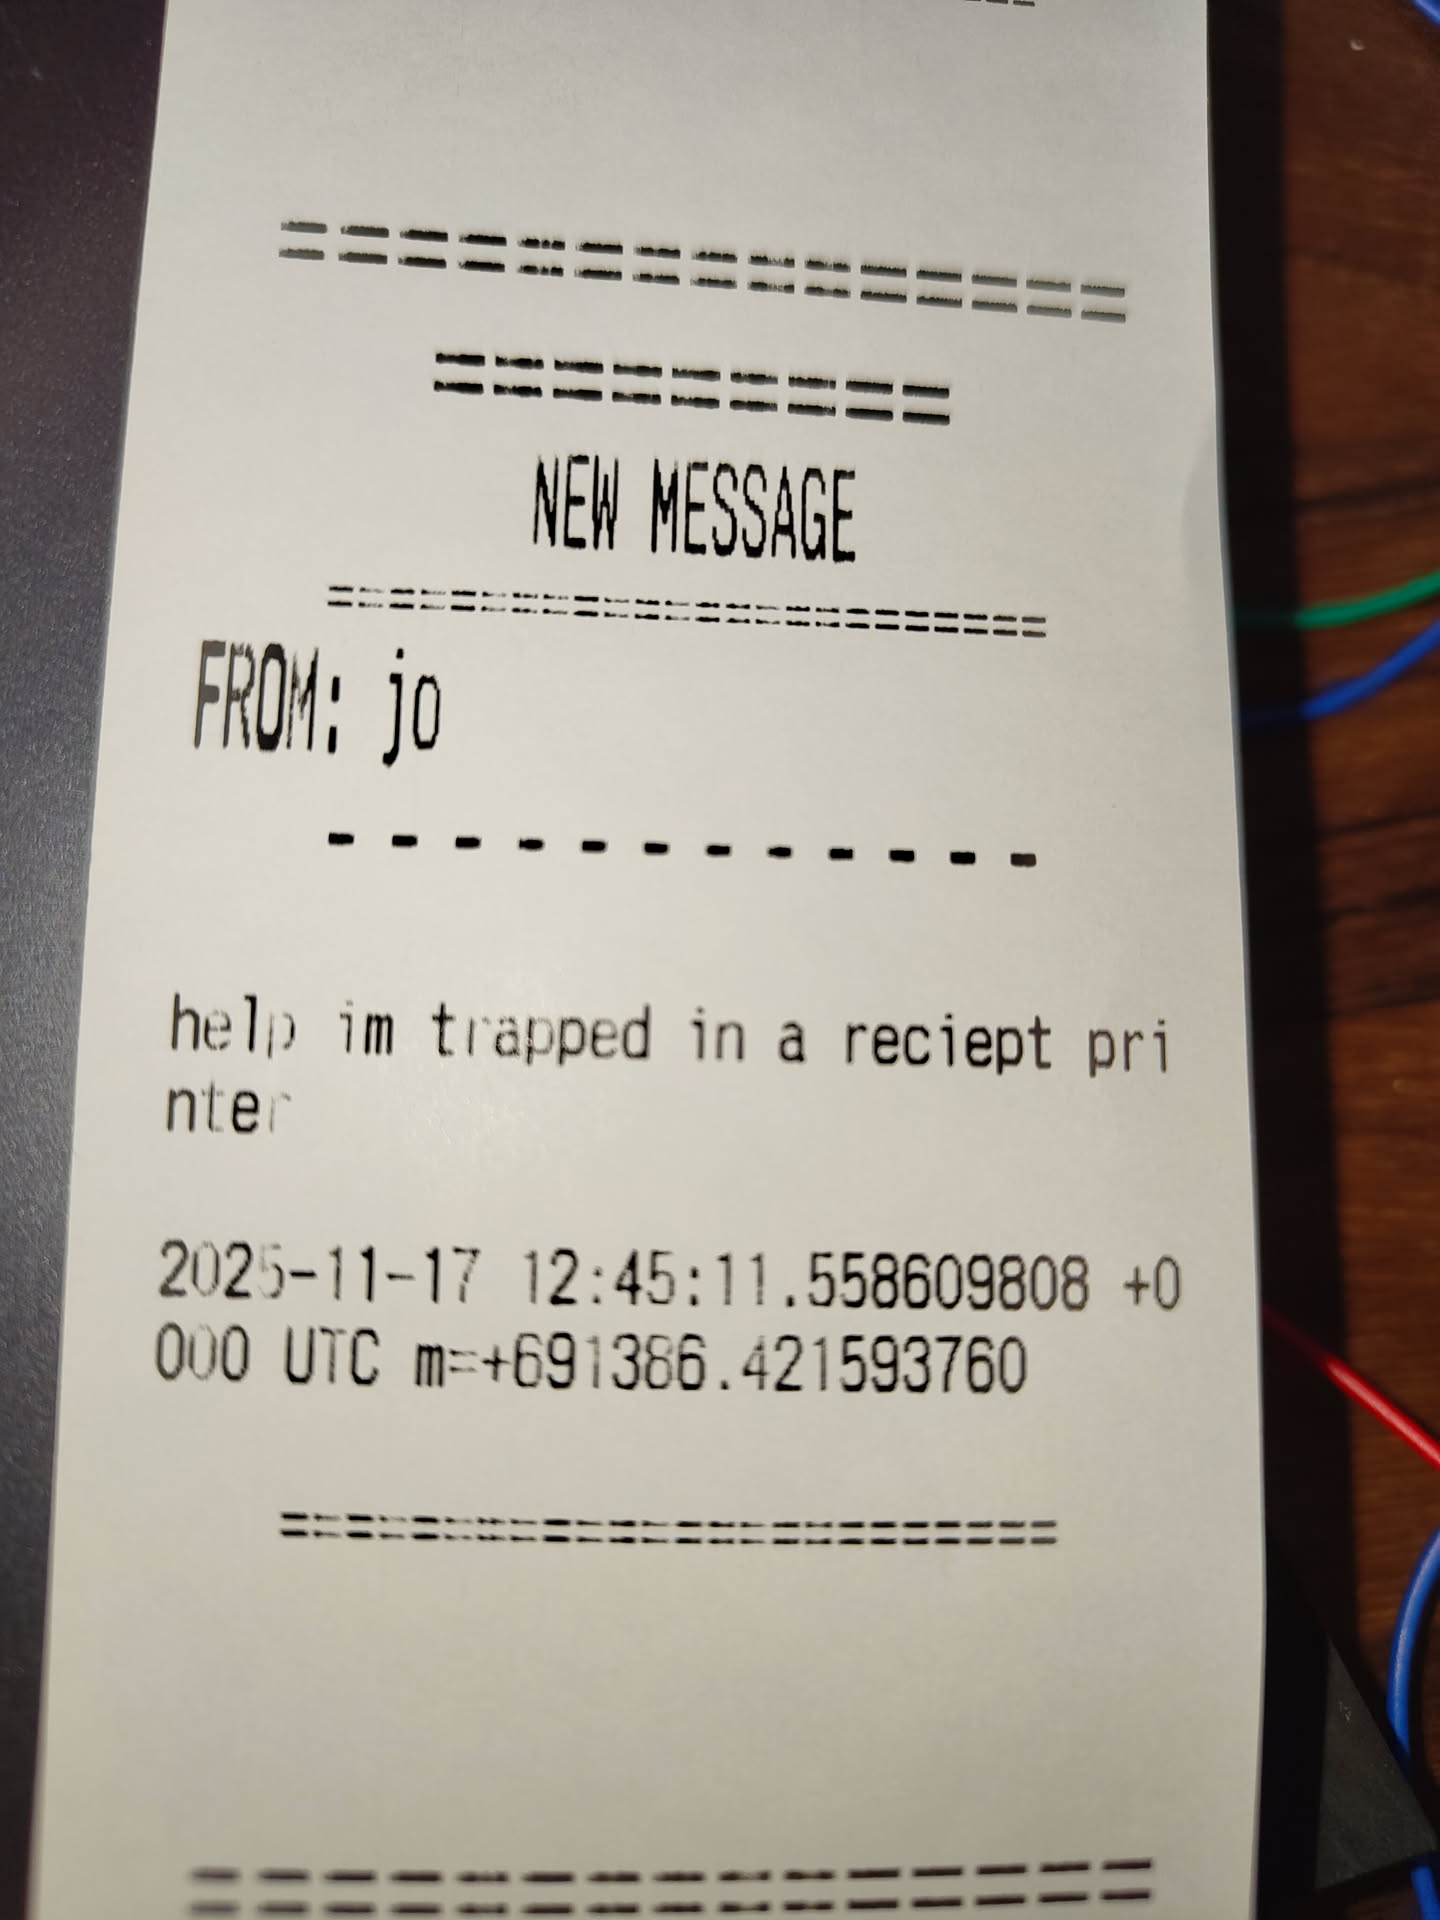
<p>It’ll look something like this:</p>

<p><img src="/assets/images/printer.jpeg" alt="image" width="100%" /></p>

<h1 id="how-it-works">How it works</h1>

<ul>
  <li>My personal ssh website is made via https://github.com/charmbracelet/wish</li>
  <li>I take a text input</li>
  <li>This adds it to an in-memory store.</li>
  <li>A http router is created</li>
  <li>A Seeed Studio Xiao ESP32-C3 sends a “GET” request every ~5s</li>
  <li>If there’s a message, it’s removed from the in-memory store, printed on my desk</li>
</ul>

<h2 id="a-few-notes">A few notes:</h2>
<ul>
  <li>I’m not providng an image of the esp32, not because it looks like a fire risk.
But 100% because it looks like a fire risk.</li>
  <li>Bastard printer requires 2A 9V, I had to use a power cord from a broken dehumidifier to use it.</li>
  <li>Some thermal printers speak alien, it’s probably an incorrect baud rate.</li>
</ul>]]></content><author><name></name></author><summary type="html"><![CDATA[Everything has a period in age, where it becomes interesting, as it’s no longer old “crap” but “cool old crap”]]></summary></entry><entry><title type="html">Using the CH32v003F4P6 in platformIO</title><link href="https://w.willx86.com/2025/11/05/ch32v003-on-platform-io.html" rel="alternate" type="text/html" title="Using the CH32v003F4P6 in platformIO" /><published>2025-11-05T18:26:00+00:00</published><updated>2025-11-05T18:26:00+00:00</updated><id>https://w.willx86.com/2025/11/05/ch32v003-on-platform-io</id><content type="html" xml:base="https://w.willx86.com/2025/11/05/ch32v003-on-platform-io.html"><![CDATA[<p><strong>Problem:</strong> I hate Mounriver IDE
<strong>Solution:</strong> Use the Arduino framework in PlatformIO with VSCode</p>

<hr />

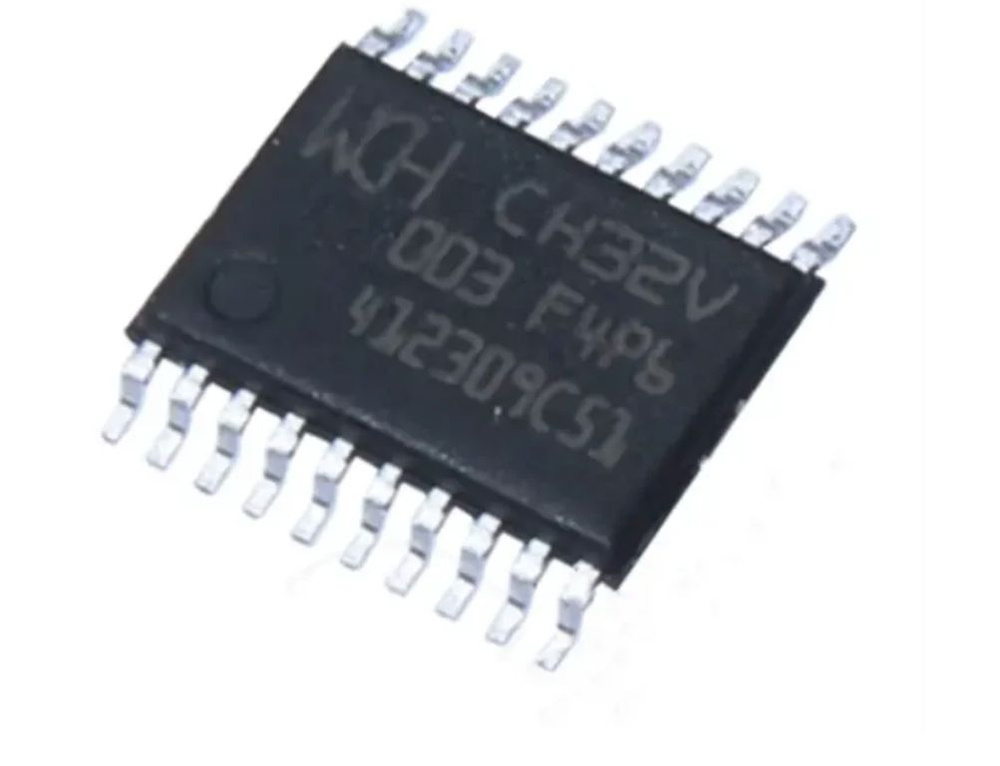
<h2 id="the-ch32v003f4p6">The CH32v003F4P6</h2>

<p><img src="/assets/images/ch32v003f4p6.jpg" alt="image" width="100%" /></p>

<p>This tiny $0.1 microcontroller is adorable.</p>

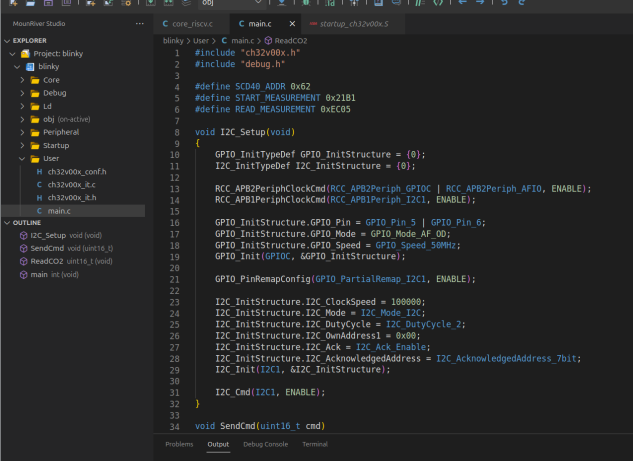
<p>I’ve recently made a custom PCB with it and I wanted to use it with PlatformIO, primarily because:</p>

<p><img src="/assets/images/mounriveride.png" alt="image" width="100%" /></p>

<h1 id="ewwwwwwwwwwww">EWWWWWWWWWWww</h1>

<p>I hate proprietary IDE’s, enviroments etc. I don’t need Neovim to work with everything, but working with:</p>

<ul>
  <li>Thonny for Micropython</li>
  <li>STM32CubeIDE for STM32’s</li>
  <li>ArduinoIDE for Arduinio’s</li>
  <li>MounriverStudio for WCH’s chips</li>
  <li>Segger for Nordic chips</li>
  <li>Neovim for the things I want to.</li>
  <li>VSCode for ESP-IDF</li>
</ul>

<p>Is horrible, and that might be a slight exaggeration, but you get the idea.</p>

<h2 id="preparing">Preparing</h2>

<ul>
  <li>Install PlatformIO I won’t baby you through this.</li>
</ul>

<p>Assuming you’re on the VSCode extension, you’ll need to open a “debug terminal” and run:</p>

<p><code class="language-plaintext highlighter-rouge">pio pkg install -g -p https://github.com/Community-PIO-CH32V/platform-ch32v.git</code></p>

<p>Then add the following to <code class="language-plaintext highlighter-rouge">/etc/udev/rules.d/99-platformio-dev.rules</code></p>

<div class="language-plaintext highlighter-rouge"><div class="highlight"><pre class="highlight"><code>SUBSYSTEM=="usb", ATTR{idVendor}="1a86", ATTR{idProduct}=="8010", GROUP="plugdev"
SUBSYSTEM=="usb", ATTR{idVendor}="4348", ATTR{idProduct}=="55e0", GROUP="plugdev"
SUBSYSTEM=="usb", ATTR{idVendor}="1a86", ATTR{idProduct}=="8012", GROUP="plugdev"
</code></pre></div></div>

<h1 id="-restart-your-system-">!!! RESTART YOUR SYSTEM !!!</h1>
<p>Please for the love of god, I <em>never</em> restart my system after changing udev rules, thinking I can trick the kernel into change them. No. Restart your system.</p>

<h2 id="doing">Doing</h2>

<p>Create a new PlatformIO project, I chose to do it with an Arduino UNO, then edit your platformio.ini to be something like this:</p>

<figure class="highlight"><pre><code class="language-yaml" data-lang="yaml"><span class="pi">[</span><span class="nv">env</span><span class="pi">]</span>
<span class="s">platform=ch32v</span>
<span class="s">framework = arduino</span> 
<span class="s">monitor_speed = 115200</span> 
<span class="s">board_build_core = ch32v003</span>

<span class="pi">[</span><span class="nv">env</span><span class="pi">:</span><span class="nv">ch32v003f4p6_evt_r0</span><span class="pi">]</span>
<span class="s">board = ch32v003f4p6_evt_r0</span></code></pre></figure>

<p>Plug in your WCH-LinkE and build and flash!</p>

<p>For me the code looked like this:</p>

<figure class="highlight"><pre><code class="language-c" data-lang="c"><span class="cp">#include</span> <span class="cpf">&lt;Arduino.h&gt;</span><span class="cp">
#define LED D4
</span>
<span class="kt">void</span> <span class="nf">setup</span><span class="p">()</span> <span class="p">{</span>
    <span class="n">pinMode</span><span class="p">(</span><span class="n">LED</span><span class="p">,</span> <span class="n">OUTPUT</span><span class="p">);</span>
<span class="p">}</span>

<span class="kt">void</span> <span class="nf">loop</span><span class="p">()</span> <span class="p">{</span>
    <span class="n">digitalWrite</span><span class="p">(</span><span class="n">LED</span><span class="p">,</span> <span class="n">HIGH</span><span class="p">);</span>
    <span class="n">delay</span><span class="p">(</span><span class="mi">1000</span><span class="p">);</span>
    <span class="n">digitalWrite</span><span class="p">(</span><span class="n">LED</span><span class="p">,</span> <span class="n">LOW</span><span class="p">);</span>
    <span class="n">delay</span><span class="p">(</span><span class="mi">1000</span><span class="p">);</span>
<span class="p">}</span></code></pre></figure>

<p>There we go :) a blinking LED, obviously change your D4 if that isn’t your LED, but you should be able to use the Arduino for programming your CH32V003’s now :)</p>]]></content><author><name></name></author><summary type="html"><![CDATA[Problem: I hate Mounriver IDE Solution: Use the Arduino framework in PlatformIO with VSCode]]></summary></entry><entry><title type="html">Designing a custom stm32 board</title><link href="https://w.willx86.com/2025/11/05/custom-stm32-board.html" rel="alternate" type="text/html" title="Designing a custom stm32 board" /><published>2025-11-05T16:52:00+00:00</published><updated>2025-11-05T16:52:00+00:00</updated><id>https://w.willx86.com/2025/11/05/custom-stm32-board</id><content type="html" xml:base="https://w.willx86.com/2025/11/05/custom-stm32-board.html"><![CDATA[<p><strong>Problem:</strong> My new office was unfathomably warm.
<strong>Solution:</strong> Completely over-engineer custom PCB to control the fan.
<strong>Actual Solution:</strong> Test first…</p>

<hr />

<p>Recently I’ve moved house, and with moving comes my beautiful new office, with a slight issue.</p>

<p>It’s hot.</p>

<p>Like really hot.</p>

<p>I bought and have used an Air-Conditioner, previously having temperatures of up to 35C… 
This worked great until it was too hot for nothing, but not hot enough to run the $0.25/hr AC. 
Let me be a bit clearer. I’m too cheap to spend $0.25/hr on being mildly hot, but I’m still <em>hot</em></p>

<p>The solution? 
A custom STM32F1 PCB to control a 12V Noctua PWM fan :)</p>

<p>So armed with a burning desire (literally) to cool myself down, I decided to build a board using the STM32F103C8T6.</p>

<p>The “solution” was to use this to control a Noctua fan via PWM with maybe a little twisty knob thing to adjust the fan-speed.</p>

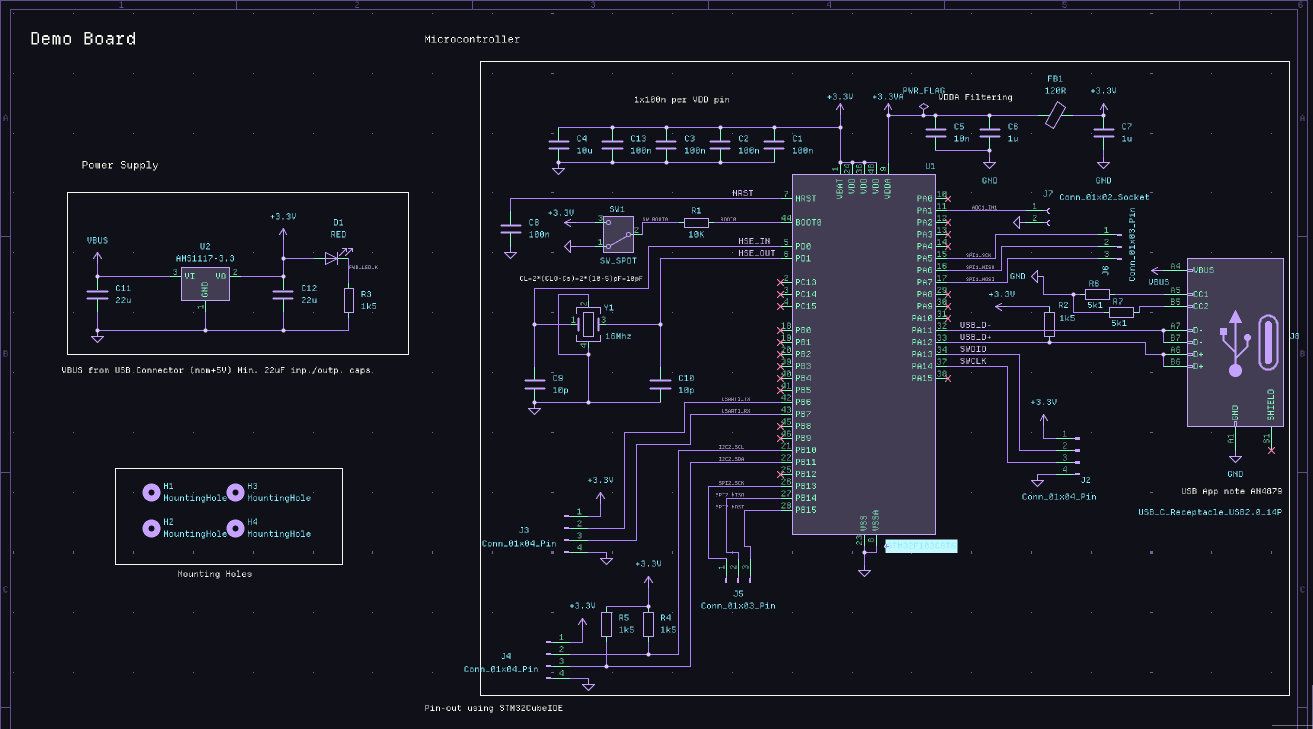
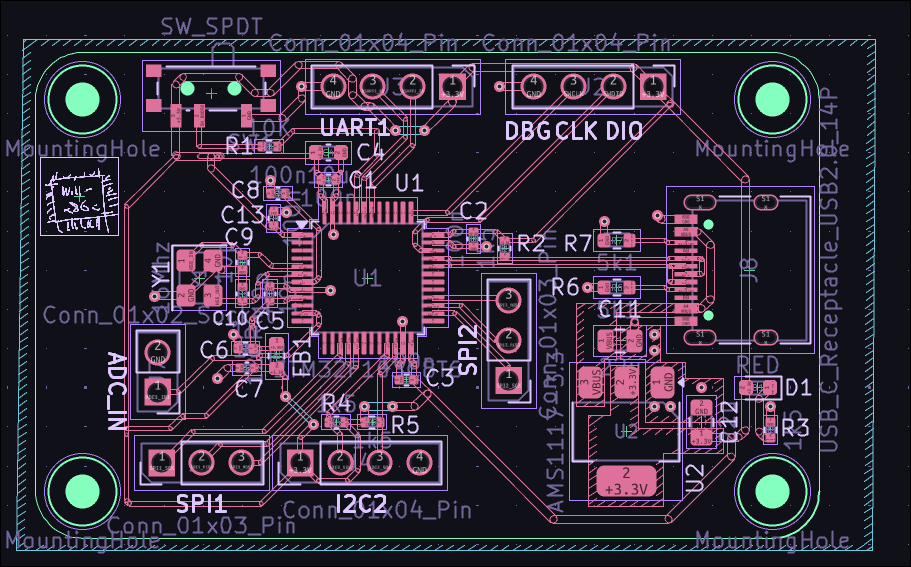
<p>Below is an attached image of the Schematic, with:</p>
<ul>
  <li>5 decoupling caps for VBAT&amp;VDDx3 with a ferrite-bead on VDDA and some more caps.</li>
  <li>Switch to pull boot0 high/low</li>
  <li>usb-c because why on earth would I use anything else.. I need to justify my manic purchasing of usb-c cables…</li>
  <li>An external crystal, because <em>obviously</em> I need to run PWM at … 48Mhz</li>
  <li>AMS1117-3.3 LDO for voltage regulation.</li>
  <li>Lots of breakout sockets</li>
</ul>

<p>The process went something like this:</p>

<h3 id="schematic">Schematic</h3>

<p>Design a beautiful schematic and triple, quadruple, quintuple check then check again.
<img src="/assets/images/stm32f1_schematic.png" alt="image" width="100%" /></p>

<h2 id="route">Route</h2>

<p>This is a two-step process where both are extremely pivotal to a working end product.</p>

<ol>
  <li>Route route route, very carefully, thinking alot about each decision.</li>
  <li>Get annoyed and tired and half-ass the last 10%, which as we all know is actually the last 50%</li>
</ol>

<p><img src="/assets/images/stm32f1_routing.png" alt="image" width="100%" /></p>

<p>It may be ugly, but it’s <em>my</em> ugly. After staring at my screen for too long, I finally hit order and waited whatever the opposite of patiently waiting is.</p>

<p>Once it had arrived and I gently ripped open the packaging I booted up my laptop and got to coding.</p>

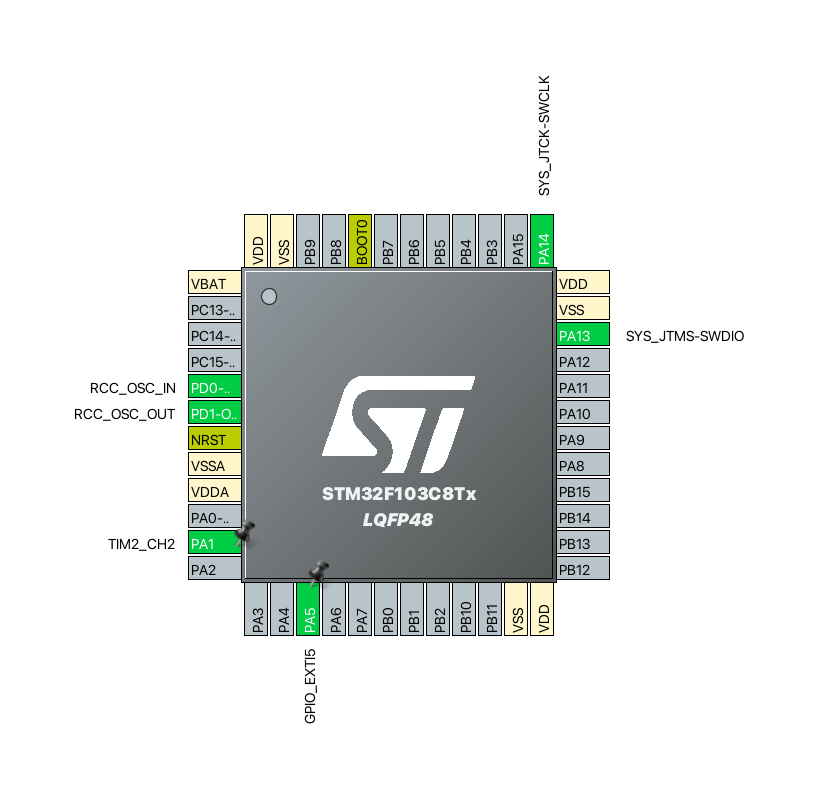
<h2 id="ioc">IOC</h2>

<p>Create a .ioc file in STM32CubeMX that generated the initial boilerplate for me.</p>

<p><img src="/assets/images/stm32f1_ioc_file.png" alt="image" width="100%" /></p>

<h2 id="coding">Coding</h2>

<p>This part was the easiest of all due to my familiarity, it took maybe 30 minutes to get this basic example working</p>

<figure class="highlight"><pre><code class="language-c" data-lang="c"><span class="cp">#include</span> <span class="cpf">"main.h"</span><span class="cp">
</span>
<span class="n">TIM_HandleTypeDef</span> <span class="n">htim2</span><span class="p">;</span>

<span class="kt">void</span> <span class="nf">SystemClock_Config</span><span class="p">(</span><span class="kt">void</span><span class="p">);</span>
<span class="k">static</span> <span class="kt">void</span> <span class="nf">MX_GPIO_Init</span><span class="p">(</span><span class="kt">void</span><span class="p">);</span>
<span class="k">static</span> <span class="kt">void</span> <span class="nf">MX_TIM2_Init</span><span class="p">(</span><span class="kt">void</span><span class="p">);</span>

<span class="kt">void</span> <span class="nf">SetFanSpeed</span><span class="p">(</span><span class="kt">uint8_t</span> <span class="n">speed_percent</span><span class="p">)</span> <span class="p">{</span>
    <span class="k">if</span> <span class="p">(</span><span class="n">speed_percent</span> <span class="o">&gt;</span> <span class="mi">100</span><span class="p">)</span> <span class="p">{</span>
        <span class="n">speed_percent</span> <span class="o">=</span> <span class="mi">100</span><span class="p">;</span>
    <span class="p">}</span>
    <span class="kt">uint32_t</span> <span class="n">pulse</span> <span class="o">=</span> <span class="p">(</span><span class="n">htim2</span><span class="p">.</span><span class="n">Init</span><span class="p">.</span><span class="n">Period</span> <span class="o">+</span> <span class="mi">1</span><span class="p">)</span> <span class="o">*</span> <span class="n">speed_percent</span> <span class="o">/</span> <span class="mi">100</span><span class="p">;</span>
    
    <span class="n">__HAL_TIM_SET_COMPARE</span><span class="p">(</span><span class="o">&amp;</span><span class="n">htim2</span><span class="p">,</span> <span class="n">TIM_CHANNEL_2</span><span class="p">,</span> <span class="n">pulse</span><span class="p">);</span>
<span class="p">}</span>

<span class="kt">int</span> <span class="nf">main</span><span class="p">(</span><span class="kt">void</span><span class="p">)</span>
<span class="p">{</span>
  <span class="n">HAL_Init</span><span class="p">();</span>

  <span class="n">SystemClock_Config</span><span class="p">();</span>

  <span class="n">MX_GPIO_Init</span><span class="p">();</span>
  <span class="n">MX_TIM2_Init</span><span class="p">();</span>
  
  <span class="n">HAL_TIM_PWM_Start</span><span class="p">(</span><span class="o">&amp;</span><span class="n">htim2</span><span class="p">,</span> <span class="n">TIM_CHANNEL_2</span><span class="p">);</span>

  <span class="k">while</span> <span class="p">(</span><span class="mi">1</span><span class="p">)</span>
  <span class="p">{</span>
    <span class="n">SetFanSpeed</span><span class="p">(</span><span class="mi">25</span><span class="p">);</span>  
    <span class="n">HAL_Delay</span><span class="p">(</span><span class="mi">2000</span><span class="p">);</span>  
    
    <span class="n">SetFanSpeed</span><span class="p">(</span><span class="mi">75</span><span class="p">);</span>
    <span class="n">HAL_Delay</span><span class="p">(</span><span class="mi">2000</span><span class="p">);</span>  
    
    <span class="n">SetFanSpeed</span><span class="p">(</span><span class="mi">100</span><span class="p">);</span>
    <span class="n">HAL_Delay</span><span class="p">(</span><span class="mi">2000</span><span class="p">);</span>  
    
    <span class="k">for</span> <span class="p">(</span><span class="kt">uint8_t</span> <span class="n">speed</span> <span class="o">=</span> <span class="mi">0</span><span class="p">;</span> <span class="n">speed</span> <span class="o">&lt;=</span> <span class="mi">100</span><span class="p">;</span> <span class="n">speed</span><span class="o">++</span><span class="p">)</span> <span class="p">{</span>
        <span class="n">SetFanSpeed</span><span class="p">(</span><span class="n">speed</span><span class="p">);</span>
        <span class="n">HAL_Delay</span><span class="p">(</span><span class="mi">20</span><span class="p">);</span>
    <span class="p">}</span>
    
    <span class="k">for</span> <span class="p">(</span><span class="kt">uint8_t</span> <span class="n">speed</span> <span class="o">=</span> <span class="mi">100</span><span class="p">;</span> <span class="n">speed</span> <span class="o">&gt;</span> <span class="mi">0</span><span class="p">;</span> <span class="n">speed</span><span class="o">--</span><span class="p">)</span> <span class="p">{</span>
        <span class="n">SetFanSpeed</span><span class="p">(</span><span class="n">speed</span><span class="p">);</span>
        <span class="n">HAL_Delay</span><span class="p">(</span><span class="mi">20</span><span class="p">);</span>
    <span class="p">}</span>
  <span class="p">}</span>
<span class="p">}</span></code></pre></figure>

<h2 id="i-shouldve-checked-this-first">I should’ve checked this first…</h2>

<p>** IT WORKS **</p>

<p>Oh and it does so everso beautifully. I believe I can compare this experience to parenthood, it’s <em>my</em> thing that I created that is working! Same thing right? 
Now you might notice that all this code does is ramp up and ramp down the fan? 
Why on earth would I create a custom PCB for a fan that just randomly spins up and down?</p>

<p>It didn’t work. The noctua fan was moving almost no air, and was too puny and small to create any measurable temperature difference.</p>

<p>Meaning to cool down my office it was practically useless.</p>

<p>Armed with this newfound knowledge I also discovered that with no PWM control, the fan ran at 100%, which was barely enough for me regardless.</p>

<p>The fan now sits on my desk, powered by a USB cable and buck-boost converter, gently blowing air on my houseplants. They seem to appreciate it. My office temperature remains unchanged - well until I got hot again and bought an industrial exhaust fan… but that’s a different story.</p>

<h2 id="a-silver-lining">A silver lining?</h2>

<p>Was it worth it? Well yes as a learning experience.</p>

<p>I learnt:</p>
<ul>
  <li>STM32 HAL framework</li>
  <li>Alot about decoupling capacitors</li>
  <li>Crystal oscillators</li>
  <li>USB-C and the 5.1k resistors on CC</li>
  <li>The importance of practicality and not rushing to get to the end.</li>
</ul>

<p>Isn’t that the point of hobbiest projects anyway? The friends we made along the way and such.</p>

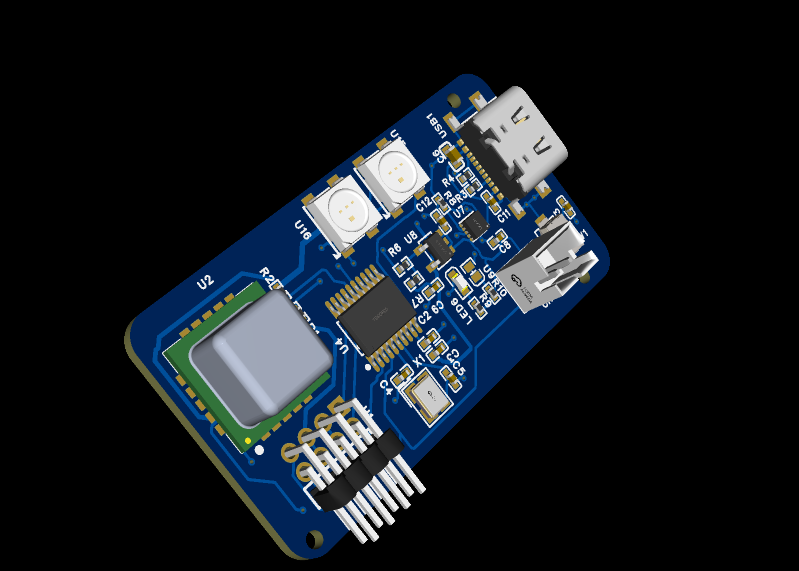
<p>My next PCB is currently being made by JLCPCB which uses the beautiful CH32v003F4P6, a $0.1 microcontroller, for reading CO2 levels with an SCD40.</p>

<p>Here’s a sneak preview:</p>

<p><img src="/assets/images/ch32v003_preview.png" alt="image" width="100%" /></p>]]></content><author><name></name></author><summary type="html"><![CDATA[Problem: My new office was unfathomably warm. Solution: Completely over-engineer custom PCB to control the fan. Actual Solution: Test first…]]></summary></entry><entry><title type="html">Declarative Flatpaks in NixOS</title><link href="https://w.willx86.com/2025/08/29/declarative-flatpaks-nixos.html" rel="alternate" type="text/html" title="Declarative Flatpaks in NixOS" /><published>2025-08-29T09:56:00+01:00</published><updated>2025-08-29T09:56:00+01:00</updated><id>https://w.willx86.com/2025/08/29/declarative-flatpaks-nixos</id><content type="html" xml:base="https://w.willx86.com/2025/08/29/declarative-flatpaks-nixos.html"><![CDATA[<p><strong>Problem:</strong> Want to declare flatpak’s the NixOS way
<strong>Solution:</strong> ..Read</p>

<hr />

<figure class="highlight"><pre><code class="language-nix" data-lang="nix"><span class="p">{</span> <span class="nv">config</span><span class="p">,</span> <span class="nv">pkgs</span><span class="p">,</span> <span class="o">...</span> <span class="p">}:</span>
<span class="kd">let</span>
  <span class="nv">grep</span> <span class="o">=</span> <span class="nv">pkgs</span><span class="o">.</span><span class="nv">gnugrep</span><span class="p">;</span>
  <span class="nv">desiredFlatpaks</span> <span class="o">=</span> <span class="p">[</span>
    <span class="s2">"com.bambulab.BambuStudio "</span>
    <span class="s2">"com.valvesoftware.SteamLink "</span>
    <span class="s2">"com.easyeda.EasyEDAPro  "</span>
  <span class="p">];</span>
<span class="kn">in</span>
<span class="p">{</span>
  <span class="c"># Literally hate bambu studio</span>
  <span class="c"># love steam tho</span>
  <span class="nv">system</span><span class="o">.</span><span class="nv">userActivationScripts</span><span class="o">.</span><span class="nv">flatpakManagement</span> <span class="o">=</span> <span class="p">{</span>
    <span class="nv">text</span> <span class="o">=</span> <span class="s2">''</span><span class="err">
</span><span class="s2">      # 2. Ensure the Flathub repo is added</span><span class="err">
</span><span class="s2">      </span><span class="si">${</span><span class="nv">pkgs</span><span class="o">.</span><span class="nv">flatpak</span><span class="si">}</span><span class="s2">/bin/flatpak remote-add --if-not-exists flathub \</span><span class="err">
</span><span class="s2">        https://flathub.org/repo/flathub.flatpakrepo</span><span class="err">

</span><span class="s2">      # 3. Get currently installed Flatpaks</span><span class="err">
</span><span class="s2">      installedFlatpaks=$(</span><span class="si">${</span><span class="nv">pkgs</span><span class="o">.</span><span class="nv">flatpak</span><span class="si">}</span><span class="s2">/bin/flatpak list --app --columns=application)</span><span class="err">

</span><span class="s2">      # 4. Remove any Flatpaks that are NOT in the desired list</span><span class="err">
</span><span class="s2">      for installed in $installedFlatpaks; do</span><span class="err">
</span><span class="s2">        if ! echo </span><span class="si">${</span><span class="kr">toString</span> <span class="nv">desiredFlatpaks</span><span class="si">}</span><span class="s2"> | </span><span class="si">${</span><span class="nv">grep</span><span class="si">}</span><span class="s2">/bin/grep -q $installed; then</span><span class="err">
</span><span class="s2">          echo "Removing $installed because it's not in the desiredFlatpaks list."</span><span class="err">
</span><span class="s2">          </span><span class="si">${</span><span class="nv">pkgs</span><span class="o">.</span><span class="nv">flatpak</span><span class="si">}</span><span class="s2">/bin/flatpak uninstall -y --noninteractive $installed</span><span class="err">
</span><span class="s2">        fi</span><span class="err">
</span><span class="s2">      done</span><span class="err">

</span><span class="s2">      # 5. Install or re-install the Flatpaks you DO want</span><span class="err">
</span><span class="s2">      for app in </span><span class="si">${</span><span class="kr">toString</span> <span class="nv">desiredFlatpaks</span><span class="si">}</span><span class="s2">; do</span><span class="err">
</span><span class="s2">        echo "Ensuring $app is installed."</span><span class="err">
</span><span class="s2">        </span><span class="si">${</span><span class="nv">pkgs</span><span class="o">.</span><span class="nv">flatpak</span><span class="si">}</span><span class="s2">/bin/flatpak install -y flathub $app</span><span class="err">
</span><span class="s2">      done</span><span class="err">

</span><span class="s2">      # 6. Remove unused Flatpaks</span><span class="err">
</span><span class="s2">      </span><span class="si">${</span><span class="nv">pkgs</span><span class="o">.</span><span class="nv">flatpak</span><span class="si">}</span><span class="s2">/bin/flatpak uninstall --unused -y</span><span class="err">

</span><span class="s2">      # 7. Update all installed Flatpaks</span><span class="err">
</span><span class="s2">      </span><span class="si">${</span><span class="nv">pkgs</span><span class="o">.</span><span class="nv">flatpak</span><span class="si">}</span><span class="s2">/bin/flatpak update -y</span><span class="err">
</span><span class="s2">    ''</span><span class="p">;</span>
  <span class="p">};</span>
<span class="p">}</span></code></pre></figure>

<p>That’s it :) import it via your configuration.nix as such:</p>

<figure class="highlight"><pre><code class="language-nix" data-lang="nix">  <span class="nv">imports</span> <span class="o">=</span> <span class="p">[</span>
<span class="c"># Other things</span>
    <span class="sx">./flatpack.nix</span>
  <span class="p">];</span></code></pre></figure>]]></content><author><name></name></author><summary type="html"><![CDATA[Problem: Want to declare flatpak’s the NixOS way Solution: ..Read]]></summary></entry><entry><title type="html">STM32 Development on Nix: stm32cubemx + ccls LSP</title><link href="https://w.willx86.com/2025/08/25/stm32-lsp-neovim.html" rel="alternate" type="text/html" title="STM32 Development on Nix: stm32cubemx + ccls LSP" /><published>2025-08-25T16:43:00+01:00</published><updated>2025-08-25T16:43:00+01:00</updated><id>https://w.willx86.com/2025/08/25/stm32-lsp-neovim</id><content type="html" xml:base="https://w.willx86.com/2025/08/25/stm32-lsp-neovim.html"><![CDATA[<p><strong>Problem:</strong> STM32CubeIDE sucks ass, I want to use NVIM
<strong>Solution:</strong> Use <code class="language-plaintext highlighter-rouge">stm32cubemx</code> with CMake output and <code class="language-plaintext highlighter-rouge">ccls</code> for LSP. GDB for debugging later on</p>

<hr />

<p><strong>Setup</strong></p>

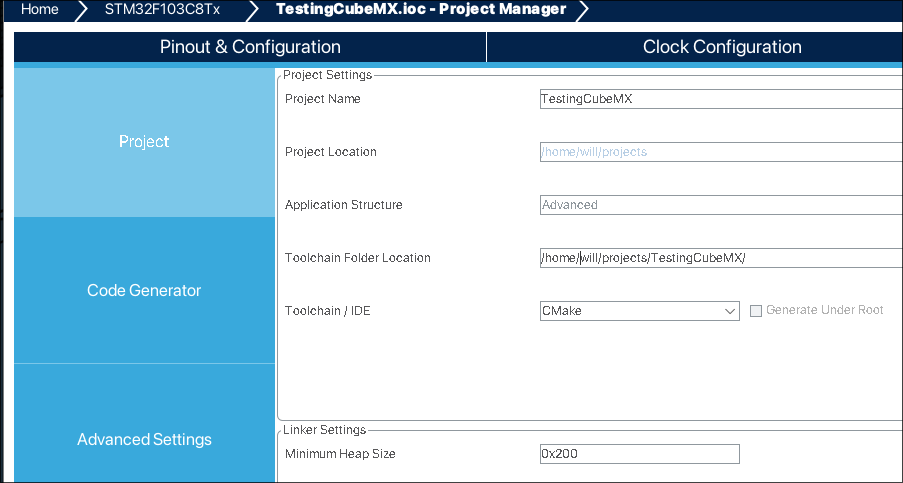
<ol>
  <li>
    <p><strong>Project Generation:</strong> Use <code class="language-plaintext highlighter-rouge">stm32cubemx</code>. Select “CMake” as the toolchain/IDE.
<img src="/assets/images/stm_32_cube_mx_cmake_vs_make.png" alt="STM32CubeMX CMake Project Settings" /></p>
  </li>
  <li>
    <p><strong>Neovim <code class="language-plaintext highlighter-rouge">ccls</code> LSP Configuration:</strong></p>
  </li>
</ol>

<figure class="highlight"><pre><code class="language-lua" data-lang="lua"><span class="n">lspconfig</span><span class="p">.</span><span class="n">ccls</span><span class="p">.</span><span class="n">setup</span><span class="p">({</span>
    <span class="n">on_attach</span> <span class="o">=</span> <span class="n">on_attach</span><span class="p">,</span>
    <span class="n">capabilities</span> <span class="o">=</span> <span class="n">capabilities</span><span class="p">,</span>
    <span class="n">init_options</span> <span class="o">=</span> <span class="p">{</span>
        <span class="n">cache</span> <span class="o">=</span> <span class="p">{</span>
            <span class="n">directory</span> <span class="o">=</span> <span class="s2">".ccls-cache"</span><span class="p">,</span>
        <span class="p">},</span>
    <span class="p">},</span>
<span class="p">})</span></code></pre></figure>

<ol>
  <li><strong>Nix <code class="language-plaintext highlighter-rouge">devShell</code> Dependencies:</strong></li>
</ol>

<figure class="highlight"><pre><code class="language-nix" data-lang="nix"><span class="p">{</span>
  <span class="nv">description</span> <span class="o">=</span> <span class="s2">"Basic emed flake"</span><span class="p">;</span>
  <span class="nv">inputs</span> <span class="o">=</span> <span class="p">{</span>
    <span class="nv">nixpkgs</span><span class="o">.</span><span class="nv">url</span> <span class="o">=</span> <span class="s2">"github:nixos/nixpkgs?ref=nixos-unstable"</span><span class="p">;</span>
    <span class="nv">flake-utils</span><span class="o">.</span><span class="nv">url</span> <span class="o">=</span> <span class="s2">"github:numtide/flake-utils"</span><span class="p">;</span>
  <span class="p">};</span>
  <span class="nv">outputs</span> <span class="o">=</span>
    <span class="p">{</span>
      <span class="nv">self</span><span class="p">,</span>
      <span class="nv">nixpkgs</span><span class="p">,</span>
      <span class="nv">flake-utils</span><span class="p">,</span>
    <span class="p">}:</span>
    <span class="nv">flake-utils</span><span class="o">.</span><span class="nv">lib</span><span class="o">.</span><span class="nv">eachDefaultSystem</span> <span class="p">(</span>
      <span class="nv">system</span><span class="p">:</span>
      <span class="kd">let</span>
        <span class="nv">pkgs</span> <span class="o">=</span> <span class="kr">import</span> <span class="nv">nixpkgs</span> <span class="p">{</span>
          <span class="kn">inherit</span> <span class="nv">system</span><span class="p">;</span>
          <span class="nv">overlays</span> <span class="o">=</span> <span class="p">[</span> <span class="p">];</span>
        <span class="p">};</span>
      <span class="kn">in</span>
      <span class="p">{</span>
        <span class="nv">devShells</span><span class="o">.</span><span class="nv">default</span> <span class="o">=</span> <span class="nv">pkgs</span><span class="o">.</span><span class="nv">mkShell</span> <span class="p">{</span>
          <span class="nv">buildInputs</span> <span class="o">=</span> <span class="kn">with</span> <span class="nv">pkgs</span><span class="p">;</span> <span class="p">[</span>
            <span class="nv">cmake</span>
            <span class="nv">ccls</span>
            <span class="nv">gcc-arm-embedded</span>
          <span class="p">];</span>
          <span class="nv">shellHook</span> <span class="o">=</span> <span class="s2">""</span><span class="p">;</span>
        <span class="p">};</span>
      <span class="p">}</span>
    <span class="p">);</span>
<span class="p">}</span></code></pre></figure>

<ol>
  <li><strong>Build and LSP Setup:</strong> From your code’s root directory:</li>
</ol>

<figure class="highlight"><pre><code class="language-bash" data-lang="bash"><span class="nb">mkdir</span> <span class="nt">-p</span> build
<span class="nb">cd </span>build
cmake <span class="nt">-DCMAKE_EXPORT_COMPILE_COMMANDS</span><span class="o">=</span>ON ..
make <span class="nt">-j</span><span class="si">$(</span><span class="nb">nproc</span><span class="si">)</span>
<span class="nb">cd</span> ..
<span class="nb">ln</span> <span class="nt">-s</span> build/compile_commands.json .</code></pre></figure>

<p>Your LSP is now working!</p>]]></content><author><name></name></author><summary type="html"><![CDATA[Problem: STM32CubeIDE sucks ass, I want to use NVIM Solution: Use stm32cubemx with CMake output and ccls for LSP. GDB for debugging later on]]></summary></entry></feed>